Plywood is made by layering multiple veneers in different grain directions. This gives the board better strength, balance, and resistance to warping. Two plywood sheets may look similar but perform differently over time because they are built different.
In this article, we discuss why good plywood depends not just on the tree, but on how carefully the wood is processed from log to finished panel.
So, let’s jump right into it and discuss the plywood manufacturing process step by step:-
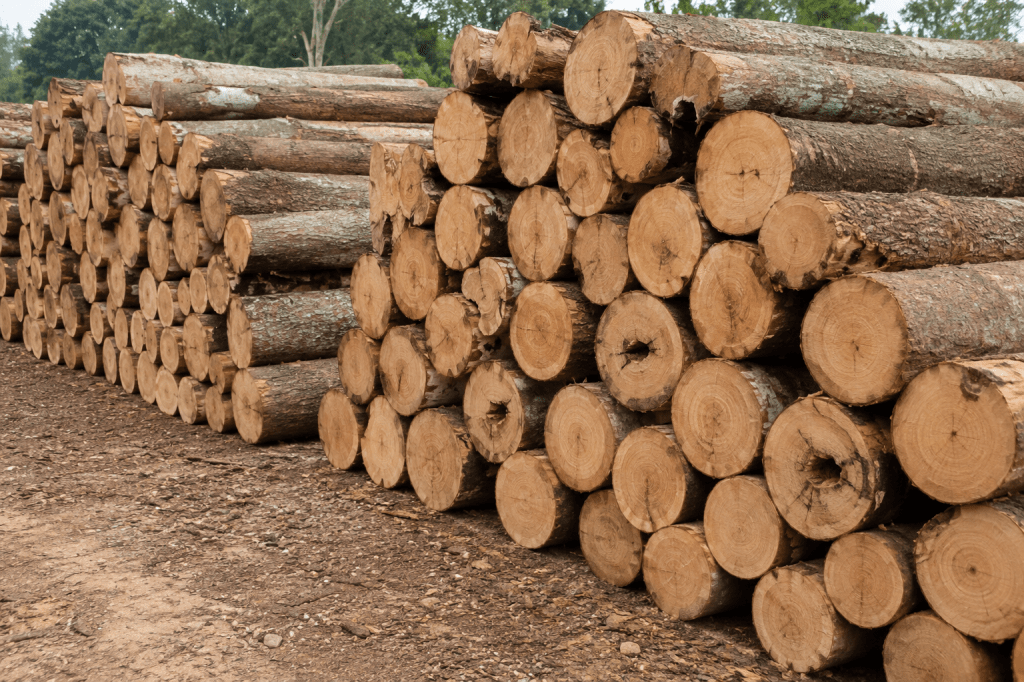
Step 1: Selecting the Right Trees for Plywood
Plywood manufacturing starts with timber selection. The tree species, log condition, and wood density decide how the final board performs. Plywood can be made from softwood, hardwood, or a mix of both.
Softwood plywood is usually made from trees like pine, fir, spruce, or cedar. These woods are generally lighter and easier to process. They are often used in construction, packaging, roofing support, wall panels, and other structural applications.
Hardwood plywood is made from trees like eucalyptus, poplar, gurjan, birch, rubberwood, or other dense wood species. It is commonly used for furniture, cabinets, wardrobes, doors, shelves, and interior work.
In this step, the timber is chosen carefully because good plywood cannot be made from poor timber. Even the best machines cannot fully fix weak raw material.
Logs with too many knots can produce uneven veneers. Cracked logs may create sheets that tear during peeling. Timber with decay can weaken the bonding between layers. High moisture variation can also make drying difficult.
Step 2: Preparing Logs for Veneer Peeling
Once the right logs are selected, they cannot be peeled immediately. Raw logs usually come with bark, dirt, uneven ends, and varying moisture levels. Before they can become veneer sheets, they need to be cleaned, cut, and softened.
This preparation stage helps manufacturers get smoother veneers with fewer cracks:-
i) Wood Debarking
Debarking is the process of removing the outer bark from the log. Bark may look harmless, but it can carry dust, stones, insects, and other impurities. If it enters the machine, it can damage the peeling blade and affect veneer quality.
Removing the bark also gives the manufacturer a cleaner view of the timber. Cracks, stains, knots, and surface defects become easier to spot. This helps workers decide whether the log is suitable for peeling or needs further trimming.
ii) Cutting Logs into Smaller Sections
After debarking, logs are often cut into smaller sections called bolts. These bolts are easier to handle and fit better into the rotary lathe.
The length of each bolt depends on the plywood size being manufactured. For example, if the factory is making standard plywood sheets, the log sections are cut accordingly. This reduces waste and helps maintain uniform sheet dimensions.
Cutting also removes damaged ends. If the end of a log has cracks or decay, it may affect the first few veneer sheets. Trimming helps start the peeling process with better wood.
iii) Log Conditioning
Log conditioning prepares the wood for smooth peeling. In this step, logs are softened using heat, water, or steam. This makes the wood fibers more flexible and easier to cut into thin sheets.
Dry or hard logs may crack when peeled. Overly wet logs may create uneven veneers. Conditioning helps bring the wood to a better working state before it enters the rotary lathe.
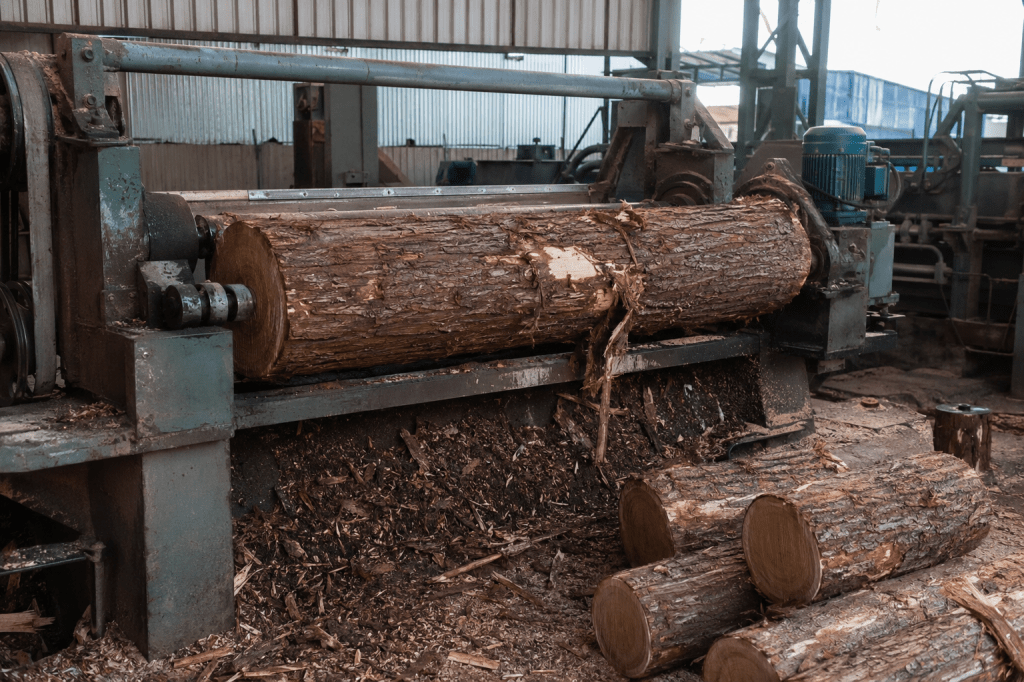
Step 3: The Veneer Peeling Process
After debarking, cutting, and conditioning, the log is ready for one of the most defining steps in plywood manufacturing: veneer peeling.
This is where a round log starts turning into thin wood sheets. and they form the basic layers of plywood. The log section, also called a bolt, is fixed inside a rotary lathe. The machine rotates the log against a sharp blade. As the log turns, the blade peels off a thin continuous sheet of wood from its surface. These sheets are called veneers,
The thickness of the veneer depends on the plywood grade and final use. Thinner veneers may be used for smoother surfaces or decorative panels. Thicker veneers may be used when strength and load-bearing ability matter more.
If the veneer is too thick, the board may become harder to press evenly. If it is too thin, it may not provide enough strength for certain uses. Manufacturers need the right balance based on the final plywood type.
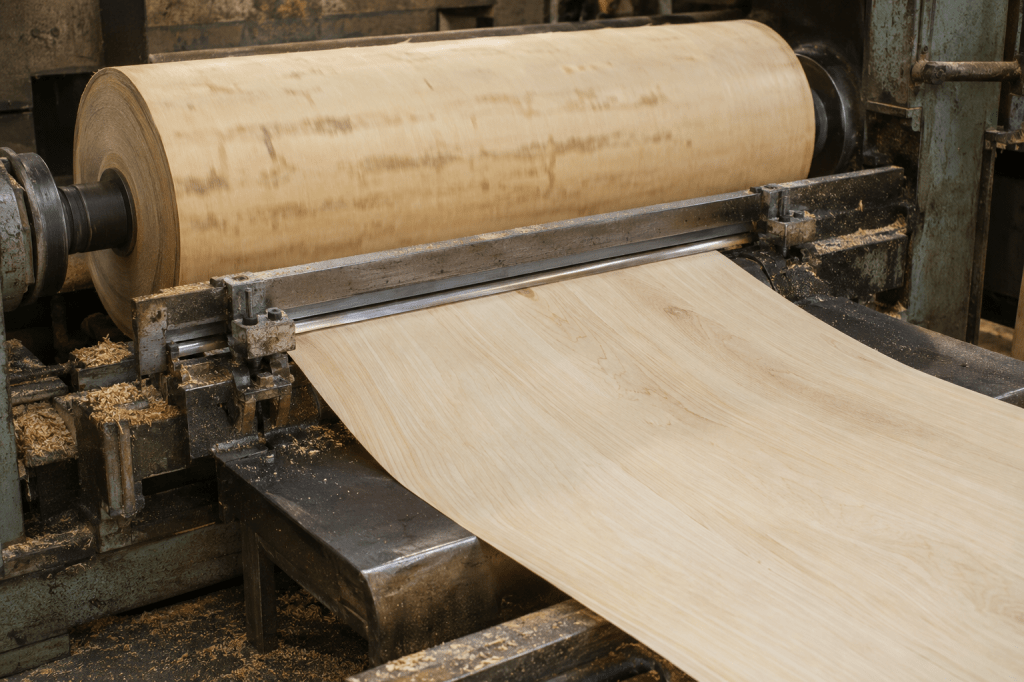
Once the veneer is peeled, it is cut into required sizes. This step is called clipping.
During clipping, workers or machines remove defective sections. These may include cracks, holes, knots, stains, or weak patches. The usable veneer is then sorted based on quality.
Step 4: Drying the Veneer Sheets
Freshly peeled veneer sheets contain a lot of moisture. They cannot be glued and pressed immediately after peeling.
If wet veneers are used, the adhesive may not bond properly. The sheet may also bend, swell, or separate later. That’s why, after clipping, veneers are passed through veneer dryers or industrial kilns. These machines use controlled heat and airflow to reduce moisture.
The drying time depends on wood species, veneer thickness, and starting moisture level. Dense hardwood veneers may take longer to dry than lighter softwood veneers.
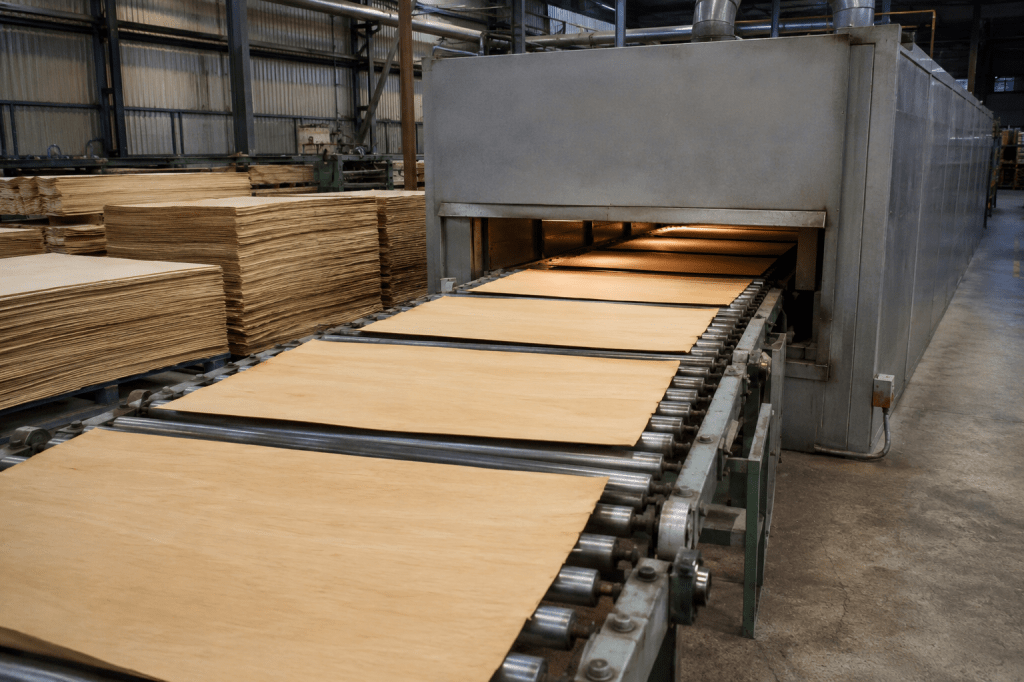
Wood naturally contains some moisture, so the aim at this step is to bring the veneer to the right moisture level for bonding and pressing. Overdried veneer can lose flexibility and break during assembly.
Once the veneers are dried, they are checked again. Sheets with cracks, bends, stains, or broken edges are separated. Good-quality veneers are kept for face and back layers. Other usable sheets may go into the core, depending on their strength and condition.
Step 5: Gluing and Cross-Grain Lamination
Once the veneer sheets are dried and sorted, they are ready for assembly. This is the stage where loose wood sheets start becoming plywood.
The veneers are arranged layer by layer and bonded with plywood adhesives. The number of layers depends on the required thickness and grade of plywood. A thicker board usually needs more veneer layers.
Most plywood use cross-grain lamination. In this method, each veneer layer is placed at a 90-degree angle to the layer next to it. For example, if the grain of the first layer runs lengthwise, the next layer is placed with the grain running widthwise. This pattern continues across the sheet.
This arrangement helps plywood resist bending, splitting, and warping. It also spreads pressure across the board instead of letting it follow one grain direction.
The type of adhesive depends on the plywood grade and where the plywood will be used. Interior plywood may use one type of glue. Moisture-resistant or waterproof plywood needs stronger bonding resins.
Good adhesive bonding helps prevent delamination, which means the layers do not separate over time. This is especially important for kitchen cabinets, bathroom furniture, doors, and areas exposed to changing moisture levels.
Step 6: Cold Pressing and Hot Pressing
After gluing and layer arrangement, the plywood sheet is still loose. The veneers are stacked together, but they need pressure to bond properly.
This is where pressing begins.
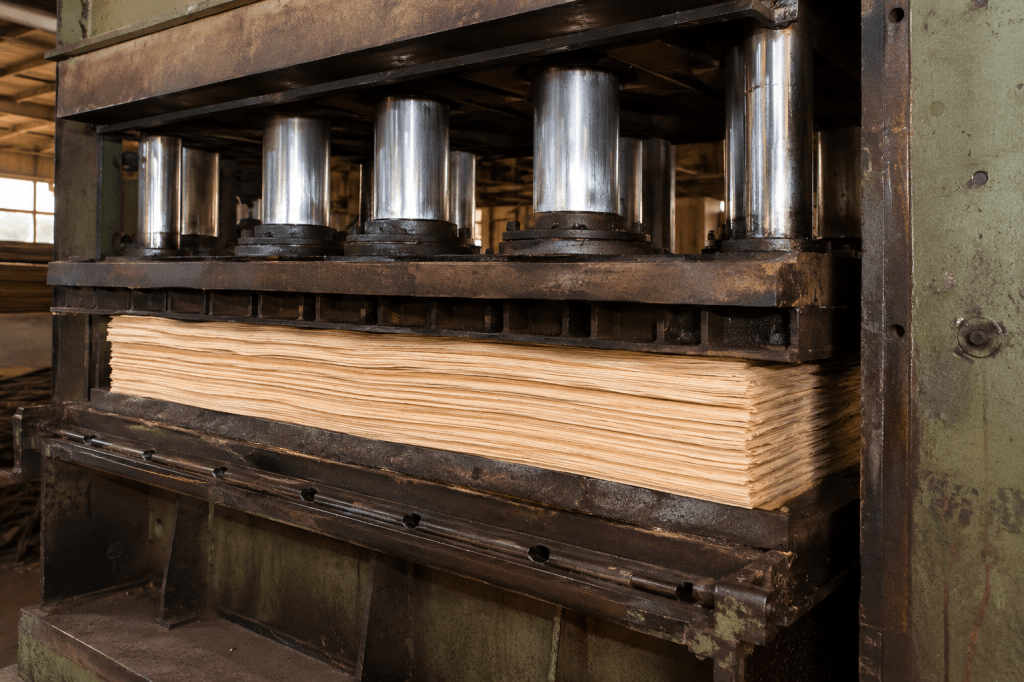
Pressing turns separate veneer layers into one solid board. It also helps spread the adhesive evenly across the sheet. Most plywood factories use two pressing stages:
i) Cold Pressing
Cold pressing happens before hot pressing. In this stage, the glued veneer stack is placed under pressure without heat. The goal is to hold the layers in position. It helps the glue spread between veneers and reduces air gaps inside the sheet.
Cold pressing also makes the stack easier to handle before it moves to the hot press. Without this step, the layers may shift during movement.
ii) Hot Pressing Wood
Hot pressing is where the real bonding happens. The veneer stack is placed inside a hot press machine. The machine applies controlled heat and pressure for a fixed time.
The heat activates the plywood adhesive. The pressure pushes the veneers together and removes gaps between layers. This creates a strong bond across the full sheet. Once this stage is complete, the plywood starts behaving like one board instead of separate layers.
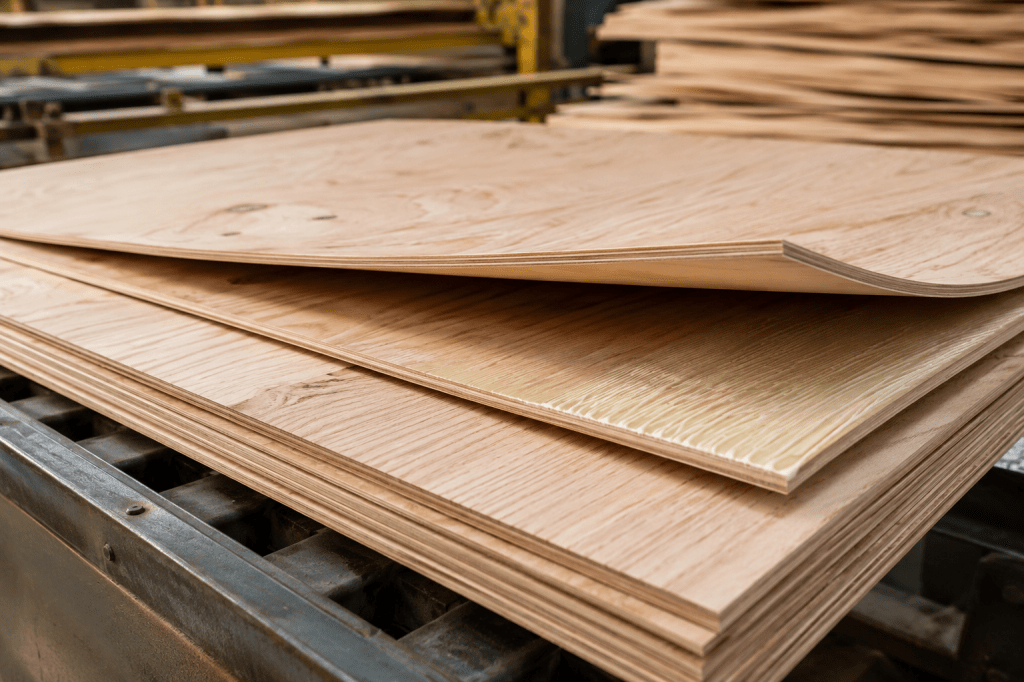
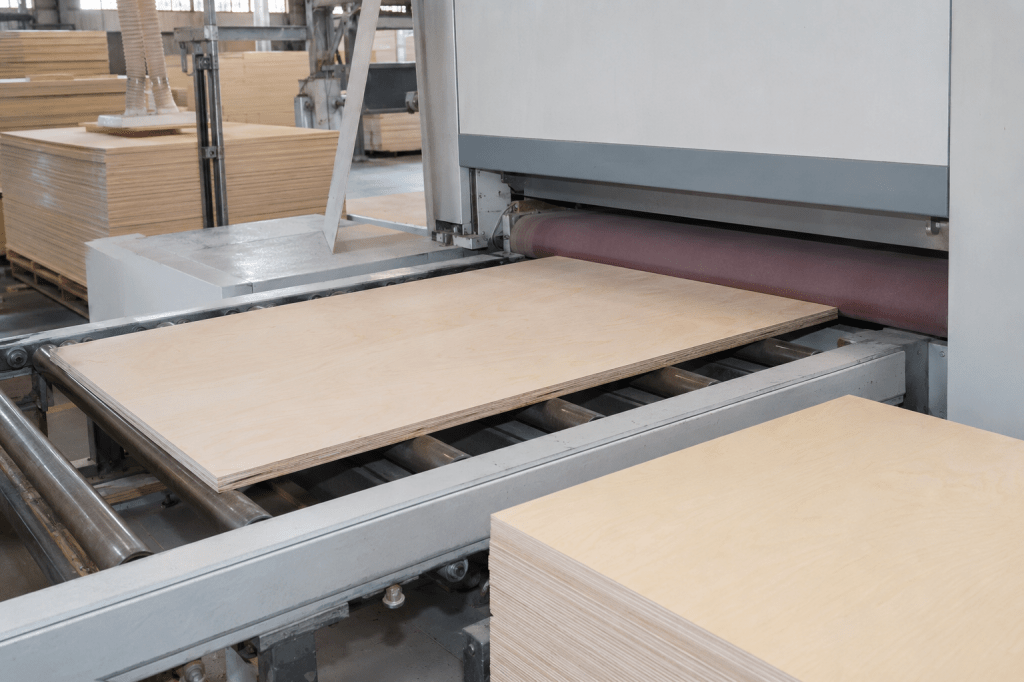
Step 7: Trimming, Sanding, and Grading
After hot pressing, the plywood has taken its final board form. But it is not ready for sale yet.
The sheet still needs finishing. Its edges may be uneven. The surface may need smoothing. Small defects may need repair. The board also needs to be checked for thickness, bonding, and overall quality.
This final stage gives plywood its usable size, surface finish, and grade:-
i) Trimming to Standard Sizes
Pressed plywood sheets are trimmed from all sides to get clean and straight edges. This removes rough corners, uneven sides, and excess veneer. It also brings the sheet to standard market sizes, such as 8×4 feet.
ii) Surface Sanding
Once the edges are trimmed, the sheet is passed through sanding machines. Sanding smoothens the plywood surface and gives it an even finish. This is important for furniture, cabinets, wardrobes, doors, and decorative panels.
iii) Patching and Repairing Minor Defects
Some plywood sheets may have small gaps, cracks, or surface imperfections. These are repaired using patches, fillers, or veneer pieces. The goal is to improve appearance and make the sheet more usable.
iv) Quality Grading
The final step is grading. Manufacturers check the plywood for surface finish, thickness, bonding, gaps, warping, and visible defects. The sheet is then marked based on its quality and intended use.
Why the Plywood Manufacturing Process Matters for Buyers
The quality of plywood is not decided by one step alone. It depends on timber selection, veneer peeling, drying, gluing, pressing, sanding, and grading. If any stage is handled poorly, the final board may lose strength, shape, or durability over time.
Here are some reasons why plywood manufacturing matters for buyers:-
1. Poor Drying Can Cause Warping
Veneer sheets need the right moisture level before gluing. If the veneers are too wet, the adhesive may not bond properly. If they are too dry, they may crack during handling or pressing. Poor moisture control can lead to bending, swelling, bubbles, or uneven surfaces.
2. Weak Adhesive Can Lead to Delamination
Delamination happens when plywood layers start separating. This usually happens because of weak glue, poor glue spread, wrong pressing temperature, or low pressing pressure. Once the layers separate, the board loses strength and becomes difficult to use.
3. Bad Timber Selection Can Reduce Strength
The plywood process starts with the tree. If the log has too many cracks, knots, or weak areas, the veneer quality suffers. Poor veneers can create weak spots inside the board. These weak spots may not always be visible from the outside, but they can affect the board during cutting, fitting, or long-term use.
4. Uneven Pressing Can Affect Board Quality
Pressing gives plywood its final strength. If heat or pressure is not applied evenly, some areas may bond well while others remain weak. This can lead to bubbles, gaps, uneven thickness, or layer separation. Good pressing helps the board stay flat, strong, and reliable.
Get Quality Plywood with Digna Ply
At Digna Ply, the focus is on helping buyers choose plywood based on real use. We help you select plywood based on application, budget, and expected durability. This is useful for homeowners, carpenters, contractors, interior designers, and businesses.
Instead of guessing which sheet to buy, you can select plywood that matches the job. For plywood, hardware, and project-specific guidance, WhatsApp Digna Ply at 8881306046.
Frequently Asked Questions
How is plywood built from trees?
Plywood is built by converting logs into thin veneer sheets. These veneers are dried, glued, arranged in alternating grain directions, and pressed under heat and pressure. After pressing, the board is trimmed, sanded, checked, and graded for different uses.
What is the veneer peeling process in plywood manufacturing?
The veneer peeling process is where a log is rotated on a rotary lathe against a sharp blade. This blade peels the log into thin continuous sheets of wood. These sheets are later clipped, dried, sorted, and used as plywood layers.
Why are plywood layers placed in different directions?
Plywood layers are placed in alternating directions to improve strength and reduce warping. This method is called cross-grain lamination. When one layer’s grain runs lengthwise, the next layer runs widthwise. This helps the board stay more stable.
What is hot pressing in plywood manufacturing?
Hot pressing is the stage where glued veneer layers are placed under heat and pressure. The heat activates the adhesive, and the pressure bonds the layers together. This turns loose veneers into one solid plywood sheet.
Does tree quality affect plywood quality?
Yes, tree quality directly affects plywood quality. Logs with cracks, knots, decay, or uneven density can produce weak veneers. Better timber usually gives stronger, smoother, and more durable plywood sheets.
What makes plywood stronger than regular wood?
Plywood is stronger than regular wood because it is made from multiple veneer layers. These layers are bonded in alternating grain directions. This structure spreads pressure across the board and makes it more resistant to bending, splitting, and shape changes.

Leave a comment